Cooking Good Food in a Tiny Kitchen

Food Box Bag These days when I arrive at People’s Food Co-op on Wednesday afternoons I make a beeline for the Gee Creek Farm stand where I announce my arrival with an enthusiastic squeal of “Food Box!” which makes the women who work there grin. They help me hunt for my box among the stack of boxes, hand-labeled with our names. Portland is a paradise for foodies, so I’m sure other people are excited about their Food Box, too, but I can almost guarantee they’re not as excited as I am!

I loooove my Food Box! For lots of good reasons:

  • Like the fact that I get to visit with the farmers while I Tetris my cucumber into the nook left between my butternut squash and my bok choi.
  • Or the fact that I then get to wander the rest of the market deciding what else to buy to turn my produce into a meal (often it’s Gee Creek’s beans, wild mushrooms from The Mushroomery, a slice of almond cake, and/or Pedro’s Three Sister’s Nixtamal tortillas – especially the Guajillo chile flavor!)
  • Or the fact that I get grins from all the people who see me biking home with my bags bursting at the seams with carrot tops and kale, beets dangling from the pockets.
  • Or the fact that I’m only paying $27 a week for this much good food!
  • Or the fact that the food box contents rotate so I get something different each week of the month.
  • Or the fact that I’ve resumed creative meal planning and begun to really enjoy cooking again. (Yes, sometimes I dirty nearly every dish in the house, but it makes the tiny kitchen feel like a mad science lab, which is rather thrilling, thank you! My crock pot and my pressure cooker are both working at full tilt again and my tiny house smells great.)
  • Or the fact that everything I’m eating is delicious and intentional (rather than an afterthought – this is mindful eating, not maintenance eating).
  • Or the fact that I’m eating sooo much healthier than those two years of wimpy nutrition during grad school.
  • Or the fact that I’ve enjoyed challenging myself each week to eat everything up before the next Wednesday food box pick up.
  • Or the fact that my grocery bill has been cut in half.
  • Or the fact that since I never open the fridge and think “there’s nothing to eat” I don’t end up eating out nearly as much.
  • Or the fact that I feel compelled to host dinner parties again because I have more food than I can possibly eat all by my lonesome.

the contents of last week's Food Box

Did I mention that I'm only paying $108 a month for more delicious, organic produce than I can eat by myself? I just think that's worth repeating... (If you'd like to sign up for a Buying Club Food Box of your own, you can register on the Our Farm Community registration page.)

I think my Food Box may be the single best health decision I've ever made (and that's coming from someone who is thoroughly enjoying Yoga Union's April Yoga Challenge!)

I first learned about Gee Creek’s organic winter buying club nearly two months ago, just before I left to teach Less Is More at Yestermorrow. I decided I’d better wait till I was home again to get started with food boxes. And it’s a good thing I did because eating this much good food is a commitment! (Fortunately, when I headed out of town recently for the Tiny House Conference, fellow tiny house builder Laura Klement helped me out by eating up a food box for me!)

Food Box Menu

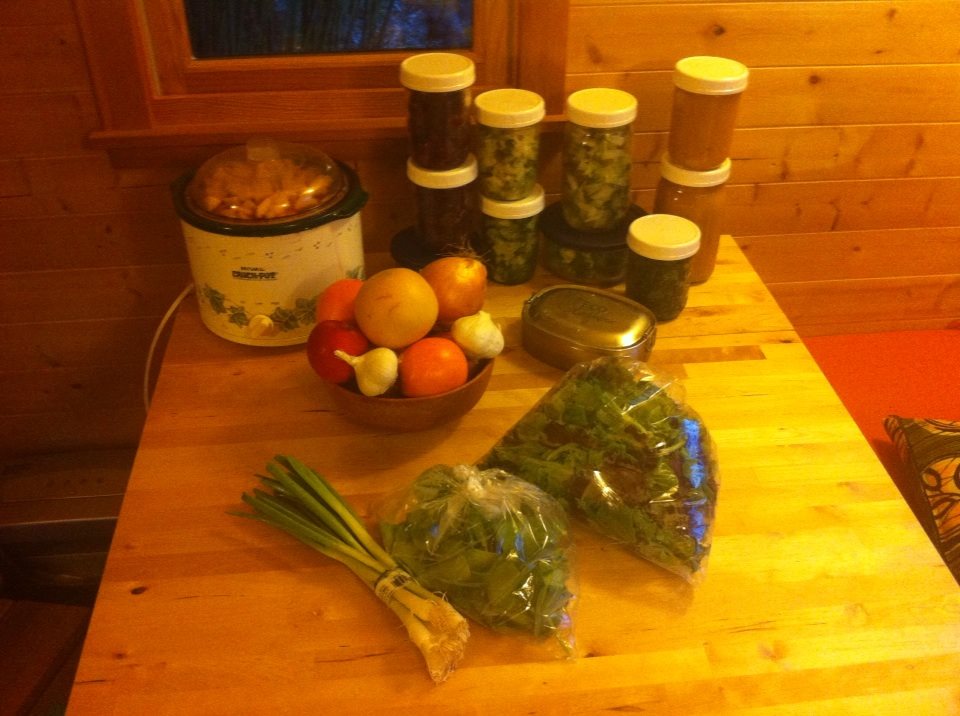
When time is squishy I turn my produce into quick fixes (grab an apple or an orange, dip some broccoli into hummus, smear some peanut butter on celery, dump dressing on mixed greens). But when I make time for cooking, like I did this evening while my friend Ricardo kept me company on a rainy spring day, I turn my produce into tasty meals for the rest of the week.

I’ve already eaten some of the stuff from this week’s food box. Here’s the menu for the rest of this week:

  • borscht with beets, cabbage, and apples (in the crockpot),
  • butternut squash and sage soup with caramelized onions and garlic,
  • salads with mixed greens, spinach, beets, pecans, and feta,
  • bruised kale salad with dried cherries and sesame seeds,
  • a broccoli and bok choi sauté with onions and garlic that will be turned into three meals (a curry, a stirfry, and a rice noodle dish with green onions)
  • beet greens with sesame oil and soy sauce,
  • celery with peanut butter or hummus,
  • apples, oranges, grapefruit

As the farmers at Gee Creek Farm say, “Enjoy your food in health!”

Yes. Yes, I will, thanks to you, Gee Creek Farmers!

Breathe Building Groundbreaking Celebration

Groundbreaking SmatteringSince January I’ve been working half-time as the Living Building Challenge Assistant for the Breathe Building. My role is to ensure that the project complies with the Living Building Challenge, which is the world’s most rigorous green building standard. We are going for Petal Certification for Equity, Beauty, and Materials, so most of my time is dedicated to researching and tracking every product considered for inclusion in the project. It’s been a wonderful opportunity to apply everything I’ve learned through my Sustainable Design-Build Certification, my Sustainable Building Adviser Certification, my Masters of Urban and Regional Planning, my Urban Design Certificate, and the work I did in the Ford District last spring. Since most of my construction experience has been in the residential sector (including Habitat for Humanity, St. Bernard Project, and a collection of tiny houses on wheels) I’ve really enjoyed the chance to learn more about commercial building. I’ve especially enjoyed being part of this project because there’s a wonderful team of people working on it and the Breathe Building will have great impact in my very own neighborhood.

The Breathe Building, located on SE 50th Avenue just north of Division Street in Portland, OR, is Portland's first commercial Living Building Challenge project. The facility is the future home of Yoga Union Community Wellness Center and Fern Kitchen. It will be a center for mindful movement, wellness, sustainability education, social gathering, and community-wide conversation. The facility includes two yoga, movement, and event spaces, as well as a wellness center, café, kids gym, sauna, gathering space, courtyard, and rooftop garden. The Breathe Building is dedicated to creating a unique community center where the health of the building mirrors the health of its occupants.

Breathe_LogoYesterday we celebrated Earth Day with a groundbreaking celebration for the Breathe Building, which drew a crowd of more than 100 people. Although the project officially began excavation in March, Earth Day was an auspicious day to recognize the start of construction on this exciting project because the Breathe Building is committed to environmental sustainability. We celebrated with lunch from Thrive, tasty cupcakes and cake, and lots of mixing, mingling, high-fives, and hugs. There were brief remarks from the Chris Calarco (the building owner), Todd Vogt (co-owner of Yoga Union),  Jay Kosa (the Communication and Community Coordinator for the Living Future Institute), and Alex Boetzel (the Breathe Building Project Manager from Green Hammer) before Annie Adamson (co-owner of Yoga Union) lead us in a dedication and intention-setting for the Breathe Building.

It was great to see so many different people here to root for this project. The Yoga Union community was present en masse because we are excited about our new facility. The Green Hammer team was there to celebrate the groundbreaking for one of their largest projects to date. Subcontractors, suppliers, and manufacturers also showed their support for this pioneering green building project. Follow along as we build the world’s healthiest wellness center!

Ordering My Tiny House SIPs

Iso Today I placed the order for my SIPs (structural insulated panels) with Patrick Sughrue of Structures Northwest. This means it’s time to schedule the wall-raising for my gypsy wagon. At this point it looks like it will be about three weeks out. Eeep! My tiny house build just got real!

floor plan of my gypsy wagon in SIPs

Ordering My Custom Vardo Trailer from Iron Eagle Trailers was a big step, but ordering my SIPs feels much more momentous to me. Patrick and I have been talking ever since we met at an open house at Caravan – The Tiny House Hotel last fall. At the time I was thinking about building my own SIPs, but Patrick convinced me it would be easier and more cost-effective to have them factory-built instead. So I spent the past few months noodling over them and it was pretty exciting to finally sign on the dotted line and write the check!

the front of my gypsy wagon - a cut out for my arched door

Patrick will be sending shop drawings for my review in the next couple days. Then my order will go to the factory where my panels will be manufactured to my exact specifications. When my wall panels arrive flat-packed they’ll already have the holes cut and the framing in place for my arched end walls, my wheelwells, My Arched Window, My Kitchen Windows, and My Beautiful Arched Door. In order to have them just right I double-checked all the measurements for my door and windows. I also had to have precise measurements from my trailer, so Laura and I paid an extra visit to Iron Eagle Trailers to take down measurements and check in with Rob. (By the way, if you let Rob know I sent you, he’ll give you $50 off your trailer order!)

Starboard

Since it’s more difficult to modify SIPs in the field than it is to modify stick-built walls, I’ve made my final decisions about my window and door placement. It’s amazing to me how much I can dither over these choices, but I’m feeling pretty good about my decisions right now. My walls will be 8 feet tall instead of the 6 feet that is more common in vardos. I love the coziness of a short-walled vardo, but living in Sweet Pea, I’ve come to really appreciate the spaciousness of higher walls. Since the sheet goods come in 8-foot lengths it would create more waste if I chose shorter walls – and it wouldn’t cost any less. Going with 8-foot walls instead of 6-foot walls, I’m able to contain more space with less waste at the same cost. Seems like a good choice to me. I’ve centered the door and windows in their panels so my house will be symmetrical. I’ve enjoyed the process of designing my house both from the inside-out and the outside-in. I can’t wait to see how it feels to be inside the space!

Port

SIPs are composed of two pieces of OSB (oriented strand board) glued to a piece of Styrofoam. Typically, I’m anti-Styrofoam. However, I believe that this is an appropriate use of the material. The very same things that make Styrofoam a lousy option for disposable packaging and single-use dishware make it great for a wall system – it takes approximately forever to biodegrade – which means it’s very durable. Additionally, it’s super lightweight (which is great for a mobile structure) and it has great insulation properties (which will reduce the long-term heating and cooling costs for my gypsy wagon). Yes, it has very high-embodied energy, and no, I probably wouldn’t use it for a ground-bound house (so many wonderful natural building options – like strawbale, which is like a natural version of a SIP!) However, I believe SIPs are an appropriate technology for tiny houses on wheels. The idea of using SIPs for a tiny house on wheels initially occurred to me four years ago, before I’d heard of anyone actually trying it. Now dozens of people have done it and I get to benefit from their pioneering efforts. (To read up on it, check out Jenna and Sean’s website Vagabode or their most recent post on TinyHomes.com To SIP or Not to SIP?)

the stern of my gypsy wagon (with a cut out for the arched window that started it all!

I’m so excited about my tiny house I’m not sure I’ll be able to sleep tonight! But I better because tomorrow is Earth Day and it’s going to be a big day. Dee’s book The Big Tiny comes out tomorrow and she’s in Washington, D.C. for the book release. There’s also a groundbreaking for the Breathe Building, a Living Building Challenge project I’ve been working on. So many great things to celebrate!

Besides, I need to get my rest because I have a lot of prep work to do in the next few weeks! Here are a few things on that list: Planing My Arched Rafters, Refinishing My Arched Door, Cleaning Up My Kitchen Windows, and Prepping My Skylights. Ready and go!

P.S. The other quote I got for SIPs was from Allen at Pacific Builders and I'm sure he would have done a great job, too. If I were building closer to their manufacturing facility in Montana, I probably would have picked them.

Skylights for My Vardo

Skylights Many of my favorite spaces have skylights, so they’ve been an integral part of my tiny house designs from the beginning. Many people decide to forgo skylights in their wee homes because of the cost or the complexity of flashing them properly. So I’m thankful that Tandem and both of the tiny houses on wheels I’ve lived in have skylights over the loft. They open up the space exponentially!

I wasn’t quite sure how skylights would work in my vardo, but living with an oculous in My Home Sweet Yurt convinced me that there’s something magical about the quality of light from directly above. I have loved being able to fall asleep with the stars hanging overhead and to wake up with a view of a squirrel tiptoeing onto the end of a branch to nibble on a fig. Once I had my heart set on having skylights overhead, I decided it would be worth the effort of figuring out how to install them on a curved roof!

Showman's Wagon

My friend John Labovitz, who built a tiny house truck called Polymecca, introduced me to the term mollycroft to describe the shape of a streetcar’s roof. A mollycroft roof is curved – both down to the sides and to the front and back – with a monitor that pops out of the center. Traditionally streetcars and showman’s wagons had little panes of glass in the clerestory, bringing light into the space. My roof design is a modified mollycroft; it won’t slope down to the front and back and the light will come from skylights at the top, rather than from the sides. However, I think (I hope!) it will look enough like a mollycroft roof to honor the gypsy wagons of yore.

Mark in his skylight stacks

Yesterday I purchased two skylights for my gypsy wagon from Mark at Natural Light Skylight Co who has been selling skylights for over 30 years. Mark primarily sells new Velux skylights because he believes they’re the best ones on the market. But, on the side, he also sells used skylights he’s removed from projects when he installs the latest and greatest. I’d love to have new Velux skylights, but it’s not in my budget, so I was pleased that Mark had these two 2x4 acrylic dome skylights.

When I first called Mark up to ask about the availability of his used skylights he helped me find the vocabulary to describe what I was looking for. And when he asked me what my project was and I told him I am building a gypsy wagon he said, “No kidding?! I made myself a gypsy wagon years ago and traveled the country in it.” When I met him to look at what he had in stock, he told me about his gypsy wagon adventures and asked about mine. He also helped me noodle through design questions to come up with a plan for installing shades. (Battening Down the Hatches in the yurt helped me figure out that shades make a big difference!)

Over the next couple weeks, before I begin construction of my roof system, I’ll be working on getting my skylights ready for installation. I anticipate this will involve finally using the can of hammered copper spray paint that I picked up at the hardware store a month ago...

Naming My Tiny House: The Lucky Penny

this lucky penny tag photo is courtesy of a fun Etsy shop called MODpaw'd that makes pet tags (https://www.etsy.com/shop/MODPawed) Check out Lina's Tiny House: The Lucky Penny for a profile of my completed gypsy wagon!

I believe there is great power in naming and it's recently occurred to me that I haven't introduced my tiny house to you yet by name. Now, I recognize that sometimes it's best to wait until after a baby is born, a house is built, etc. to determine whether the name fits before announcing it, but in this case, it seems so right I'll take the chance. After all, I was telling everyone at the Tiny House Conference this past weekend! So I won't keep you wondering any longer. My tiny house is The Lucky Penny!

Here's why: My Tiny House Started with a Window I found for free four years ago, which inspired me to make the house a gypsy wagon with a curved vardo roof. A couple years later I picked up My Beautiful Arched Door at the ReBuilding Center. Then, since I'm a little superstitious, I quickly acquired A Sink for Good Measure. From there on out, it's been a Tiny House Treasure Hunt.

My tiny house's name came to me, as so many of my good ideas do, at three in the morning. As I thought about the curvy shape of the roof and the delightful coppery goodness of the sink, I realized that these character pieces were giving me a theme. My house is all about round and copper, so it seemed fitting to name it The Lucky Penny. (Anita wrote about my tiny house's naming earlier this week on TinyHomes.com in her post What's in a Tiny House Name?)

Copper CanistersI've found all sorts of confirmation that The Lucky Penny is the right name for my tiny house. Such as the fact that I've been the lucky recipient of several deals, donations, and discounts. And finding these charming copper canisters at an antique store after years of not finding any countertop containers that seemed just right. And a friend randomly sending me 25 DIY design ideas that use pennies. And then finding pennies all over the place since learning about penny tiling. (When I was a kid my little sister was forever finding pennies and I wasn't nearly as good at spotting them, so now every time I do I get a little thrill. And I stop to pick them up. I don't believe in unlucky pennies. I just believe the heads-up pennies are twice as lucky! Did I mention I'm strangely superstitious?!)

As I've been Budgeting for My Tiny House, I've realized that, like so many other wee abodes, my house will be quite expensive per square foot. I may well end up nicknaming my tiny house The Pretty Penny because chances are it will cost one! But for now I'll remain optimistic that my community will around my little house and the serendipity will continue so that The Lucky Penny continues to be the best name for my gypsy wagon.

Tiny House Conference 2014 Kick Off

meeting fellow tiny housers and touring their wee homes in anticipation of the Tiny House Conference (photo credit: Chris Tack) Tiny house lovers from across the country have descended upon Charlotte, NC this weekend for the Tiny House Conference. I couldn't be more excited about this opportunity to geek out about one of my favorite things! We will spend the next two days watching presentations (I'll be speaking on Tiny House Building Basics later today), touring tiny houses, and mixing and mingling.

Speakers were invited to arrive yesterday evening so we could get acquainted with each other and the facility. It was great to finally meet some of the folks I've been following: Macy Miller of minimotives, Hari and Karl of Tiny House Family, Andrew Odom of Tiny (R)evolution, and, of course Ryan Mitchell of The Tiny Life. It was also great to meet some new-to-me-but-probably-not-you-if-you've-been-watching-the-tiny-house-scene tiny house builders: Kelly and Chris, Frank, and Teal and Gerry of Wishbone Tiny Homes. Their tiny homes are be-a-u-ti-ful and I'm eager for everyone to see them, especially if they've never been inside a tiny home before!

The conference is sold out and I'm guessing many of you didn't manage to get tickets and make the trek to North Carolina, so if you'd like to live vicariously, follow along this weekend. Internet access and cell service are limited on the site, but we'll do our best to facebook and tweet the event with the hashtag #thc14.

Building My Arched Rafters

arched laminated rafter This year I'm Kicking Off Spring with Tiny House Prep! Today I began building my arched laminated rafters. I'm building a gypsy wagon, also known as a vardo. Over and over again I find myself drawn to little arch-topped houses, so I've decided to make one of my own. I've never lived in an arch topped house before, but did live in My Home Sweet Yurt, which had a circular roof and a round oculus. And I'm a big fan of the arched roof on Caboose at Caravan - The Tiny House Hotel, John Labovitz's tiny house truck Polymecca, and Big Maroon. And, of course, Little Bird, which is one of my all-time favorite tiny houses.

Katy Anderson, the incredible craftswoman who built Sweet Pea has generously allowed me to borrow her jig to make the rafters. I my mixed grain fir milled up by the fine folks at Creative Woodworking. It cost a small fortune to have the milling done, so these rafters will probably cost twice what I originally estimated. But I'm fine with paying for the milling since I didn't have a good way to cut 130 pieces of 12 foot long 1/4" thick fir. Over the past couple weeks I hunted at nearly every hardware store in town to find a glue applicator like Katy recommended. I finally found one at Woodcrafters. They had the best price on Tightbond III as well, so I got a couple gallons of that on Friday when I was Kicking Off Spring with Tiny House Prep. I also dropped nearly $200 on clamps, because, you know, "you can never have too many clamps." I currently have 20. Need more clamps...

At the moment I have the first half of the first rafter on the jig. I feel like a kid eager to open a present, waiting to unclamp it and see how it worked! I'll be building my arched rafters over the next ten days, so I'll let you know how it goes.

Kicking Off Spring with Tiny House Prep

giant chair and tiny house I returned home from teaching Less is More: Designing the Small or Tiny Home at Yestermorrow in Vermont to find that Portland had greeted spring in a cacophony of cherry blossoms! So it is time, officially to begin my tiny house build.

I celebrated the first day of spring with lots of tiny house prep. In the morning Laura Klement and I went to Green Anchors to check it out as a potential build site. Laura and I met in the Tiny House Design-Build class at Yestermorrow last October and she moved back to Portland to build her tiny home because, well, Portland is the epicenter of the tiny house universe! Laura and I are interested in building together because we are on a similar timeline and can help each other out and make things go more quickly.

Green Anchors is an alluring option for these reasons:

  • it's right under the incredible St. John's bridge
  • there are storage lockers available
  • there are other talented people who are up for skill sharing
  • the river is right there, which will be very tempting the summer
  • there's plenty of space to move comfortably around a tiny house
  • there's no need to worry about making a racket with power tools

The only big disadvantage is that it's a 9 mile bike ride from my house. And that's not such a big deal now that the weather is beautiful, but it's going to be a royal pain if I'm hauling things! I've considered buying a truck, but so far I haven't quite figure out how to make it pencil out.

In the afternoon, I went to Iron Eagle Trailers so I could talk to Rob and get exact measurements for my vardo trailer so I can refine my design. Rob told me that someone was coming down from Alaska to pick up a tiny house trailer. It seems like a long haul, but Rob is truly the tiny house trailer expert in the Pacific Northwest and he builds stronger, lighter, smarter, and less expensive tiny house trailers than anyone else I've found. I've been very pleased with the trailers Rob has built for me and I refer people to Rob all day long, so we recently set up a deal. If you tell Rob I sent you can get $50 off your trailer order! If you're thinking of building this summer, it's time to get your trailer into the production line! You'll be right behind Laura who placed her order last week.

I also made a trip to the hardware store to pick up my glue, clamps, and glue applicator so I can begin building my arched rafters for my vardo. Stay tuned for more about Building My Arched Rafters.

In the evening I went to PAD's Tiny House Mixer and it was a lot of fun to visit with fellow tiny house enthusiasts. I also loved seeing the update on Ben's tiny house. He's done a fabulous job with his tongue and groove interior siding. It looks beautiful!

Three cheers for cracking open the tiny house. Are you building this summer, too?!

Less Is More Presentations

Less Is More Class Photo On Sunday night Dave Cain and I kicked off Less is More at Yestermorrow with photographic introductions and a parti exercise. On Monday, Tuesday, and Wednesday we had field trips and design time. Dave and I also lead a series of mini-workshops covering everything from tiny home regulations and financing to structural considerations and humanure systems. By Thursday it was Less Time, More Drafting. And Friday we had our final presentations from twelve wonderful students. Check out the photos in Day 5: Less is More Presentations.

Fortunately, Paul Hanke (one of my co-instructors for the Tiny House Design-Build course - which has just a few more open spots for July!) and Kathy Meyer (who has taught small house design courses at Yestermorrow before) joined us as jurors to give feedback and suggestions. We got to see these amazing presentations:

  • Elliot's tiny home on wheels with a triple-duty multipurpose table and a complex arched roof
  • Reese's snowboarder's heaven on wheels, outfitted with everything needed for hitting the slopes (perhaps even including the slope of the roof?!)
  • Eli's get-away with shaded verandas and big fans to beat the Georgian heat and room for dance parties to dance to the beat
  • Addie's tiny home on wheels with a lofted sleeping nook accessible by a clever ladder with built-in storage
  • Anna's cat-friendly cottage with a reading nook tucked over the stairs
  • Geoff's timberframed cruc home featuring a sunken living room and just the basics to live happily (like a baby grand piano!)
  • Jody's tiny home on wheels with a cozy window seat, a bay window, and a clever ladder
  • Hannah's small home featuring a krunkle (or two) and an alleyway for access to the porch and art studio
  • Caitlin's Oratory - a garden shed/beekeeping workshop/eventual sauna built from reclaimed materials and flooded with light from handmade stained-glass windows
  • Annie's cabin which employs permaculture principles to heat water and use graywater from the tub for greenhouse plants
  • Greg's gypsy wagon for farmers, which borrows inspiration from sheepherders wagons of old
  • Jenna's desert oasis for family gatherings, including a soaking tub, a dining patio, clever sleeping nooks, and a simple humanure system

Less Time, More Drafting

Visiting the old Sugar Shack Our week of Less is More at Yestermorrow has flown by! It seems like just yesterday we said Welcome to Less is More and now, all of the sudden, tomorrow is our presentation day. On Monday, Tuesday, and Wednesday we had small home tours in the morning, a design lesson in the afternoon, and evening discussion and slideshows. You can learn about our Sunday orientation and our Monday tours in Welcome to Less is More.

Check out the Day 2 Slideshow for photos from Tuesday when went on 3 small home tours. First we toured Suzanne's home, which is rumored to be an old sugar shack.  She added a mudroom, a sunroom, and a small office when she remodeled a few years ago. Her home features wide counter tops, a trap door to the basement, built-in storage in the sleeping loft, and stained glass separating the bedroom from the clawfoot tub. I think if I lived in this beautiful home I'd spend a good deal of time soaking up sunshine in the sunroom with its wonderful views.

checking out Sallie's kitchen layout

Then we headed to Sallie's small home, which I adore since it's fun to see a place that was designed by a woman my size. Sallie doesn't have any upper cabinets in her kitchen so it's nice and bright with sliding glass doors on one side and windows on the other. I am particularly charmed by the ship's ladder to the guest room and her octagonally-shaped bedroom.

Afterwards we explored Todd and Molly's log cabin, which has two cozy lofts - one for sleeping and one for knitting, TV watching, and reading. They have clever ladders, beautiful woodworking, and a great mudroom, in addition to a very cool vintage fridge.

Yesterday we headed to my co-instructor Dave Cain's place which is not as small as most of the designs being created in this class, but still not so big. Check out the Day 3 Slideshow to see photos of Dave's place and our design work! Dave's house features 12 inch walls which create deep windowsills and a nice quiet inside. He and his partner Nancy have included lots of lovely touches that make their home cozy and unique. I'm especially fond of the lighting Dave made out of old electrical insulators!

Reese gets the lay of the land in this tiny house by taping it on the floor of the studio!

A big snow storm came through, dumping several inches of snow. Before it really got going we did a little walk around of Elizabeth Turnbull's tiny house, which was one of my original inspirations to attend Yestermorrow and design and build myself a tiny house.

Today the snow storm has provided just the right conditions for hours and hours of design. It's fun to see so many different design processes at work. Check out the Day 4 Slideshow for pictures of Drafting Day! We have students sketching, drafting, and researching. There are people taping out kitchen layouts on the floor and delving into SketchUp modeling. I've enjoyed answering and asking questions as the designs evolve. I can't wait to see everyone's presentations tomorrow!